Harvest of Amgarrak is the main quest in The Golems of Amgarrak DLC for Dragon Age: Origins.
Acquisition[]
You will gain the quest after watching the cutscene after first setting foot in Amgarrak Thaig.
Walkthrough[]
Finding Brogan[]
After setting foot in Amgarrak, you will be sealed within the thaig. You will get your first glimpse of the Harvester, but it will scurry off down a passageway upon approach. Examining the bloodstain on the floor will net a worried reaction from Jerrik, and looking at Darion's journal will give you the first part of Codex entry: Darion's Journal. As yet, only one corridor is accessible, and that is the one the Harvester ran down. Follow the Harvester.
The first room you reach is one with a rune anvil surrounded by two ancient signs. Approaching the anvil will cause two elite sentinels and two elite watchers to attack you. Split your party to minimize the effect their boulders have on your party members. Once they are dead, you can use the Rune Anvil to apply any runes you have collected to your equipment. A treasure chest lies in the southwestern alcove from which a golem attacked. In the northwestern alcove is another chest, but it is sealed by a blue light. To the east are three more chests sealed with blue light; approaching them triggers a comment by Jerrik.
Continue down the corridor, and you will find Brogan, also trapped with blue light. Jerrik is dismayed that he cannot speak with Brogan. As there is nothing you can do for Brogan at the present, convince Jerrik to keep moving.
In the next chamber, you will catch another glimpse of the elusive Harvester, guarding a pile of bones, which will warrant another horrified reaction from Jerrik, and another fragment of Darion's journal. Attempting to leave the chamber will trigger a battle with a Boss-level Phantasmal warrior, accompanied by two elite-level Phantasmal crossbowmen and an elite-level Phantasmal shadow. After besting the spectres, be sure to loot the chest, which contains five Elemental Grenades. Lying next to the chest is a note that will give you Codex entry: Ancient Writings, which provides some more insight into what went on in Amgarrak from the perspective of its dwarven overseer.
Proceed, and you will once again see the Harvester, this time sitting by a pile of corpses. It will scuttle into the next room. The only thing in this room is another chest sealed by blue light. Investigating the pile of corpses will result in Jerrik giving an exasperated response requesting answers. Follow the Harvester.
Although it has disappeared, the Harvester has lead you to a Lyrium well. These contraptions, created by Nereda, the Tevinter mage overseeing the operations at Amgarrak, are capable of shifting those who use them through dimensions of the Fade. Be sure to get Jerrik to loot the chest containing a Greater Tome of the Mortal Vessel before activating the switch. A short cutscene will play wherein the Lyrium well will spin wildly, and coat everything in a bright blue light. Jerrik will remark that "everything looks like Brogan", and urges you to find him once again.
Travel back to the previous chamber, and you will be attacked by two Warped Watchers. After killing them, you will be free to loot the chest which contains a variety of Superb-level potions. Next to the chest is another fragment of Codex entry: Ancient Writings, detailing the dwarf overseer's request for more iron from the Miner's Guild and his use of the casteless.
Finding Brogan will trigger a difficult conversation between him and Jerrik. Brogan has been addled by his extensive exposure to pure lyrium, and thus has trouble making sense. Brogan urges you to search for Darion, the scholar who lead the expedition, in order to search for answers as to what happened in the thaig. After the conversation has ended, Brogan becomes your fourth companion.
Before continuing, return to the chamber immediately before the blue fade switch, and notice a side-chamber that was sealed with the blue force field before you entered the blue fade. Enter that side-chamber and move toward the chests in the back of the room, spawning a fight with several corpses and a boss-level Twisted Sentinel. Once you defeat these enemies, loot the chest for another Greater Tome of the Mortal Vessel. Then, return to the blue Fade switch, exit the Fade, and return to the side-chamber, which is no longer sealed. This time you will have to fight four lieutenant-level watchers. Once that fight is over, loot the chest for Golem Research Notes: Healing, giving your Runic Golem the Group Heal spell. Now, return to the blue Fade switch, re-enter the blue Fade, and return to the room in which you met Brogan. (Note, you can do all of this before getting Brogan, but the fights are tougher without him.)
Searching for Darion[]
Retrace your steps back into the room with the rune anvil. Here, you will be set upon by four elite-level Twisted Sentinels (PS3: two boss-level Twisted Sentinels) and a boss-level Warped Watcher. This fight is incredibly difficult, as the Twisted Sentinels will constantly barrage your party with Blizzards and Crushing Prisons. Make sure the spellcasters die first, as it will make killing the Warped Watcher a lot easier. Another easier strategy using a ranged character, verified on the PS3 and PC, is to make your party hold position in the previous chamber, and slowly inch your Warden down the center of the room until the Warped Watcher appears. Then, target it with a very long-distance spell or arrow to get his attention. (You will probably have to go with a 10m AoE spell like Earthquake or Tempest, to get the needed range.) As soon as it reacts, run back to your party in the previous chamber and wait for the enemy to come to you (you will probably get hit once or twice with the pull-talent, so make sure you get around the corner before that happens, otherwise you will be thrown into the middle of the room and the other enemies will spawn). If done correctly, only the Warped Watcher will spawn, and you can fight it in the previous chamber, before returning to the Rune Anvil chamber to fight the Twisted Sentinels. An alternate strategy that works just as well is to equip Jerrik with a bow, and tell the rest of your party to hold their ground behind the corner to the chamber's entry. Move Jerrik into the room and fire at the Watcher. As soon as you get his aggro, run quickly behind the corner where the rest of your party stands; he can very well try to pull Jerrik to him, it won't work since Jerrik will be standing behind the wall. The Watcher will run to your party where you can safely dispose of him without the adds bothering you. Twisted Sentinels are vulnerable to Mana Clash, with enough spellpower, you can dispose of one in a single cast of the spell, while your party focus in the other two mobs, which should effectively kill them without provoking too much damage.
After the fight has concluded, there are four chests to loot: the one in the northwestern corner of the room contains Golem Research Notes: Fire, which upgrades your Runic Golem. The three chests in the eastern annex contain respectively various weapon coatings, Golem Research Notes: Mechanics, which levels your Runic Golem, and 4 different types of arrows.
Proceed back to the entrance hall, in which you will be set upon by a group of undead. This is possibly the easiest fight so far, as they are all Normal-level enemies. Once they are dead, proceed to the doorway with the blue barrier over it. Previously, this was blocked off, but you are now able to pass through it, as you are in the blue Fade dimension. The room beyond the force field contains another Fade switch and the third entry in Darion's journal. Short and sweet: "There is something in here with us." Activate the switch; doing so will send you out of the blue Fade dimension. Activating the switch once again will send you into the purple Fade dimension, also revealing the third entry of Codex entry: Ancient Writings. The codex sheds some light on how the Harvester may have been created.
This switch also makes the northernmost chamber accessible (on your map, look for the Sunken Grotto marker; there is a door that was previously inaccessible), which contains Golem Research Notes: Healing and Golem Research Notes: Lightning, as well as various pieces of powerful loot including The Reaper's Cudgel. However, pilfering this cache will trigger a battle second to only the Harvester in difficulty, so beware. See the Reaper's Cudgel page for tips on how to win this fight.
Once in the purple Fade dimension, you have access to the large room opposite the entrance containing a Lyrium well. Entering the room will invoke a chilling tale from Brogan telling you, in detail, how his comrades were murdered by what could only be the Harvester. Examining the bloody footprints by a nearby door will make Jerrik mention how someone must have been badly injured nearby. Crossing the bridge while in a Fade dimension will cause several corpses to spawn and attack, but they can be defeated easily. To the south is a red barrier, and to the southeast is a door blocked by a white barrier (signaling that you must be out of the Fade to pass).
Go through the northern door, the only one accessible at the moment, and you will enter the control room for the Lyrium well. You will be attacked by two Lieutenant-level Warped Watchers. After killing them, use the Fade switch to leave the purple Fade dimension, and you will be presented with a puzzle guarded by 4 inactive Sentinels. You will find the combination to the switch puzzle when you find Darion. Getting the combination wrong will result in the Lieutenant-level Sentinels attacking you. Since you don't know the combination yet, leave the control room and head south.
Entering the Lyrium well room without being in a Fade dimension will trigger an attack by a Primal phantasm, a Phantasmal crossbowman, and a Phantasmal warrior, all Lieutenant-level enemies. Crossing the bridge is considerably harder; a boss-level Primal phantasm and Phantasmal shadow are accompanied by two Lieutenant-level Phantasmal warriors will appear. Outside the door to the forge lies another entry in Darion's journal.
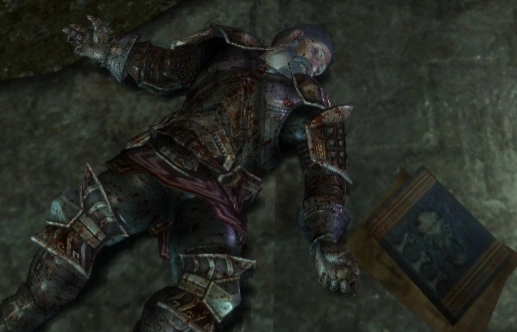
The corpse of Darion besides his final journal entry
It is not advisable to enter the forge immediately, because there is a door in the southeastern part of the room that requires you to be out of the Fade to enter. In this cave you will find the late Darion, clutching his final journal entry, guarded by two elite-level Sentinels to which he had apparently found the control rod. Upon his corpse you will find Darion's Notes, which will tell you the combination to enter the red Fade dimension. Nearby is a chest containing the Sash of Forbidden Secrets. The combination for the switches is: Y, M, W, C. Head back to the control room, and you will find another entry in Darion's journal. Now, input the Y,M,W,C combination, and a switch in the center of the floor will activate. You can now enter the red fade dimension.
Once you have entered the red Fade dimension, it's time to seal Amgarrak once and for all. Note that you do not have to be in the Fade to enter the forge; the barrier disappears once you enter the right combination in the control room. However, being in the red dimension is required to obtain the second Golem Research Notes: Mechanics for the A Secret Stitched Together achievement (the chest is in the end of a tunnel starting in the north-east corner of the forge room).
Destroying the forge[]
The bane of Amgarrak lies in wait. Enter the forge and kill the Harvester. See The Harvester (strategy) for assistance.
Rewards[]
Killing the Harvester on casual or normal difficulty will yield the Reaper achievement, and will award all your characters with the Sash of Forbidden Secrets.
Killing the Harvester on hard or nightmare difficulty will get you the Grim Reaper achievement and The Reaper's Cudgel for use on all your other characters. For players looking to start new Origins games, this is an incredibly valuable achievement, because it can be sold for 339![]() 55
55![]() 0
0![]() (or even 679
(or even 679![]() 10
10![]() 0
0![]() if selling to Gorim Saelac as a Dwarf Noble).
if selling to Gorim Saelac as a Dwarf Noble).