Shadows of the Blackmarsh is a main quest in Dragon Age: Origins - Awakening.
Background[]
A Grey Warden named Kristoff was absent from Vigil's Keep when the darkspawn attacked. He was sent to discover why the darkspawn were still active with the Fifth Blight defeated. Seneschal Varel believes that he began his investigation in the City of Amaranthine.
Walkthrough[]
Vigil's Keep[]
Talking to Varel will reveal the existence of a Grey Warden named Kristoff who was not present during The Assault on Vigil's Keep. He suggests that the Commander investigate his whereabouts starting from the City of Amaranthine where he was probably staying in one of the local inns.
City of Amaranthine[]
Kristoff's room
The Warden-Commander goes to the City of Amaranthine and locates the Crown and Lion Inn where Kristoff was staying. The Innkeeper then provides some trivial information about Kristoff. If the Warden-Commander revealed their identity he will immediately give the key for Kristoff's room, otherwise he needs to be intimidated (Expert Coercion is required) to release it. Inside the room the Commander can read his journal which mentions, in the last entry, about his intention to visit the Blackmarsh. However the quest updates by inspecting the map on the wall which shows that all the Amaranthine locations have been crossed out except the Blackmarsh. This also unlocks a new area to be visited to find more about Kristoff's status.
The Blackmarsh[]
At the Blackmarsh, the Warden-Commander senses that there are darkspawn inside the marsh. Apparently that is true as blight wolves, blighted werewolves and the Children are located inside. Kristoff's camp is found right outside the village. The camp indicates that it wasn't touched for days. Eventually the Warden-Commander finds the corpse of Kristoff. Then, several darkspawn, children and the First encircle the Commander of the Grey. The First says that the Mother told him to leave Kristoff's corpse there because she knew that this would lure the Warden-Commander. Furthermore, he says that the Mother knows that the Warden-Commander works with the Father and that's why she gives that gift to them. Then the First takes out an orb which sends the Warden-Commander to the Fade.
The Blackmarsh Undying[]
Upon waking up in the Fade, the Warden-Commander discovers that The First has also entered the Fade. It is quickly revealed that the latter didn't expect to enter the Fade as well and mentions that he was deceived by the Mother. Then he orders the other darkspawn around him to attack the Commander while he leaves in order to find his way out of the Fade. Furthermore, he will reject any offer to work together with the Warden-Commander.
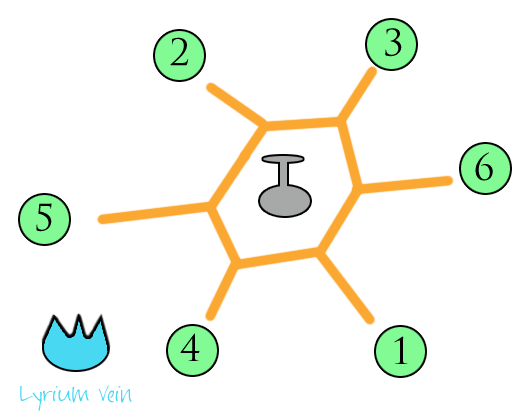
Puzzle walkthrough
Upon defeating the darkspawn and start exploring around the Fade, several shades will attack. Scattered around the Fade are stats boost fonts (see the Blackmarsh Undying and Shadowy Crypt for a list), and desire demons keeping the veil tears in the Blackmarsh open (see Tears in the Veil). Of further note is a puzzle involving stones.
Once you reach the docks you will encounter a young woman tending to a grave which will activate the A Maiden in Distress quest before you are attacked by some undead. Afterwards you can enter the Shadowy Crypt in order to pass under the battlements into the village. The crypt is only a small path but is filled with a large number of undead which can overwhelm the Wardens.
After the Warden-Commander exits the Shadowy Crypt, a Village Watcher stops them for a brief talk. He says that he and his fellow villagers have been trapped in the Fade for so long that they barely remember their lives back in the real world. Once you enter the village, you will notice many villagers outside of the estate rioting. Amongst them is also the spirit of Justice, who explains the role that the Baroness played in bringing the villagers to the Fade and ask them to help. In return Justice will try to find a demon in order to collect information on how the Warden-Commander will return to the mortal world. Then the Warden's companions may comment on what to do but ultimately the decision lies in the Commander's hands.
- The Warden-Commander decides to help the villagers and storms the estate's gates.
- The Warden-Commander decides to enter the estate and speak to the Baroness. The doorman will initially refuse entry but eventually if he is not threatened he will open the gates for them. If he is threatened, he will refuse, but the Commander can knock the gates again however this time it will require a Persuasion check to be passed in order to allow entry (Improved Coercion is required).
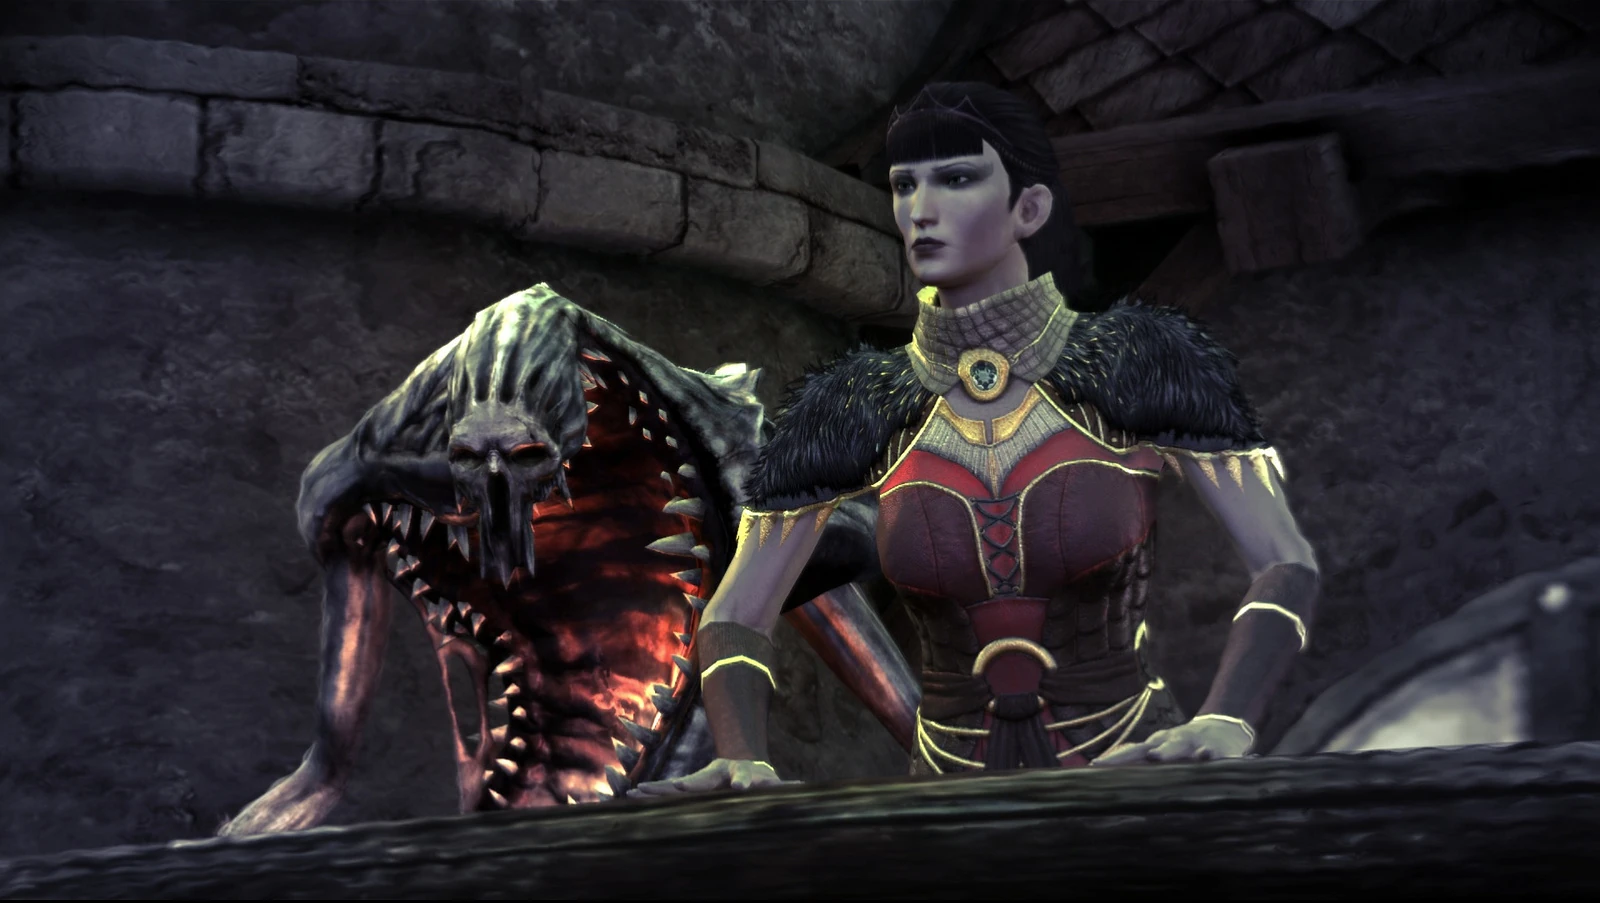
The Baroness and her Ash Wraith Guard
Once inside a cutscene will start with the Baroness exiting the estate accompanied by two ash wraiths. In the upcoming discussion she will claim that she owns the villagers and she casted them to the Fade because they burned her alive in her own home. Then she will propose to the Warden-Commander to help them to return to the real world and in return to help her deal with the villagers. The Commander can also persuade her to give another reward for this service (expert Coercion is required) which she will accept should the persuasion check pass.
Regardless of which side is picked, Justice along with the villagers storms the gates and enters the estate's courtyard. If the Warden-Commander stormed the gates with him, The First will already be at the courtyard with the Baroness, otherwise he will be with Justice. The spirit will then order the Baroness to free the villagers however she will refuse. If the Commander decided to work with the Baroness, they can also betray her now. If this happens, then The First will also betray Justice and work for the Baroness. Furthermore, The First cannot be in the same side with the Warden-Commander even if the latter invites it to.
Once the two sides have been set, a brawl will be initiated at the estate's courtyard. Justice will fight a single duel with the Baroness (which cannot be influenced or ever end) and the Warden-Commander will have to fight against The First with some darkspawn and:
- The doorman and two ash wraiths if they sided with Justice.
- The villagers if they sided with the Baroness.
Eventually when The First's side is defeated the Baroness will use his life force to return the Commander and their party to the mortal world or herself in case the Commander didn't side with her and thus was defeated. If the Warden-Commander sided with her she will grant one of the following:
- One point of Magic.
- One point of Cunning.
- One point of Constitution.
- Learn the Blood Mage specialization (that is only available if the specialization is not yet unlocked).
 The reward is bugged and it is not given by the Baroness. However users can use a third party mod to solve the issue. It can be found here.
- There is no downside to siding with the Baroness, Justice will still start at 0 approval if you do and you receive the same exp.
The Blackmarsh[]

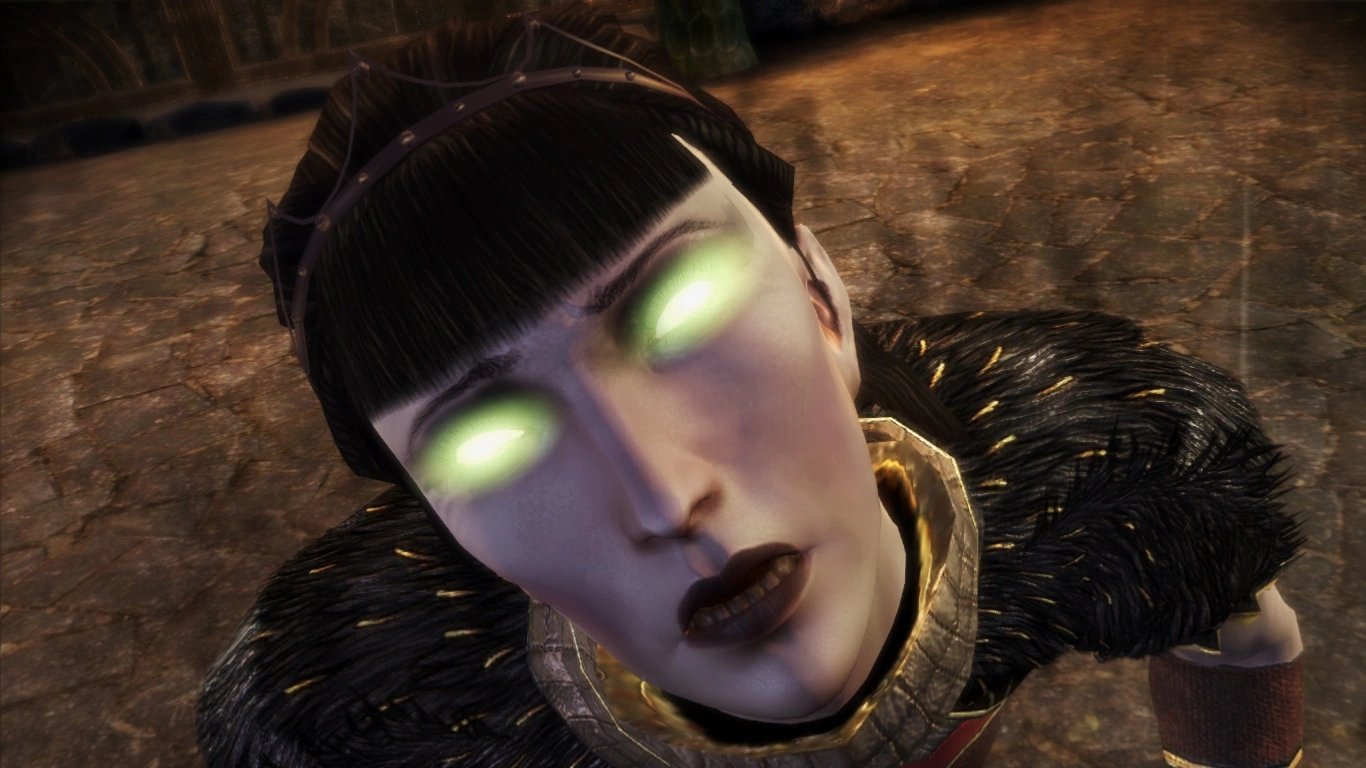
The Baroness transforms into a pride demon
Back in the physical world, the Warden-Commander wakes up and notices that Kristoff's corpse is moving. It is revealed then that when the Baroness crossed the veil, Justice was unintentionally brought here as well. He also mentions that he senses the Baroness being inside the Blackmarsh and she must be destroyed as she is possessed by a pride demon. The First also lies dead nearby as well.
The Warden-Commander eventually encounters the Baroness in front of her estate. If the Commander sided with her she mentions that it wasn't in her intention to return from the Fade as well, however she quickly starts to envision herself as a ruler of this realm. Even if the Commander sided with her she cannot be dissuaded to not attack the Warden's party. She then reveals her real form which is a Pride demon and the fight starts. The Baroness is a boss and will periodically spawn Fade Portals which will spawn demons. However eventually she is defeated and the quest is concluded.
Result[]
Justice may join the party. Furthermore, the First is killed as well as there are more information revealed about the Mother.
Approval[]
Helping Justice
- Oghren approves (+2)
- Nathaniel approves (+2)
- Sigrun approves (+2)
- Anders approves (+1) if persuaded to side with Justice, (-3) if not persuaded
- Velanna approves (+1) if persuaded to side with Justice, (-3) if not persuaded
Helping the Baroness
- Anders approves (+2)
- Oghren approves (+2)
- Velanna approves (+2)
- Nathaniel approves (+1) if he is convinced it's a good idea, (-3) if he is not convinced
- Sigrun approves (+1) if convinced, (-3) if not convinced
(Entering without Justice and choosing the 3rd dialogue option every time gives you +2 from Oghren, Velanna and Anders, if latter has been persuaded that the Baroness could be useful)
Rewards[]
- 2000 XP - finding Kristoff's body
- 2000 XP - escaping the Fade
- 4000 XP - killing the pride demon (Baroness) in the physical world
- 500 XP - solving the runestone puzzle in the Fade (optional unmarked side quest)
Notable items[]
- Firestompers, source: The Baroness.
- Gladiator's Belt, source: Runic Pedestal.
- The Mother's Chosen, source: The First.
- Sentinel armor set, source: The First and Iron Chests.
- Soulbound, source: The Baroness.
- Catgut, source: Mabari corpse.
- Dock Storage Key, source: The Baroness.
- Eldest Dragonbone, source: Dragonbone Rubble.
Companion gifts[]
- Kristoff's Locket, source: Rocks.
- Ornate Silver Bowl, source: Debris.
- Toy Horse, near Town Records.
Other concurrent quests[]
- The Burden of Guilt
- Heart of the Forest
- The Lost Dragon Bones
- A Maiden in Distress
- Ser Alvard's Missing Sword
- Tears in the Veil
- The Trail of Love
- Worked to the Bone
Trivia[]
- If the First is beheaded during combat, his head will not reappear when the Baroness uses his life force to send them out of the Fade.
Exploits[]
- If a Fade portal is left open, shades will continually spawn every 20 seconds as long as combat continues with each providing 97 experience. This allows for infinite experience.
Bugs[]
- The Trail of Love sidequest may be unable to be completed if you leave for the Fade. It is best to complete this quest before discovering Kristoff's body.
- If you choose to destroy the Baroness and you succeed, your journal will update, but the quest marker that tells you to defeat the Baroness may not be removed.
- The Baroness may not port you back to the real world after you kill the First, leaving you unable to continue.
- Disable the blood magic modal ability before you talk to Justice or knock on the gate. One report indicated having this ability enabled causes the bug.
- A full uninstall and reinstall of the game may fix the bug. Be sure to backup game data first, such as saved games, characters, and screenshots.
- Use the console command runscript zz_stb_debug to plot-jump to "after the fade" after you slay and loot the First. This will skip you to exactly the correct spot you should normally be in after you kill the First. It is unknown if there are adverse side effects later on due to the console-jump.
- More data might be available in this BioWare forum thread.
- Right before you meet the woman at the docks, the game may partially crash. This results in parts on character models (torso, arms, legs, hair) to completely disappear or lose coloring. Loading screens will also display moving black rectangles instead of the regular screen. This can be fixed by simply rebooting the game.